Build A Dining Room Table is more than just a weekend project—it’s a venture into functional artistry. A dining table is the centerpiece of family gatherings, where meals are shared, stories are told, and memories are made. Building one yourself allows for complete customization, ensuring it fits your space, style, and needs perfectly. This guide will walk you through each phase of the process, from selecting the right materials to adding the final polish, helping you create a durable and beautiful table you’ll be proud of for years.
Choosing the Right Design
Before the first piece of wood is cut, it’s crucial to determine the design that best compliments your dining space. Consider the overall aesthetic of your home. Is it rustic, modern, minimalist, or eclectic? Farmhouse tables with thick legs and distressed finishes evoke warmth, while sleek, Scandinavian designs offer clean lines and simplicity. Think about functionality, too. Do you need an extendable table for hosting large gatherings, or will a compact round table suffice for intimate dinners?
Gathering Materials and Tools
Proper preparation sets the foundation for success. A comprehensive list of materials and tools ensures a smoother workflow without unexpected interruptions.
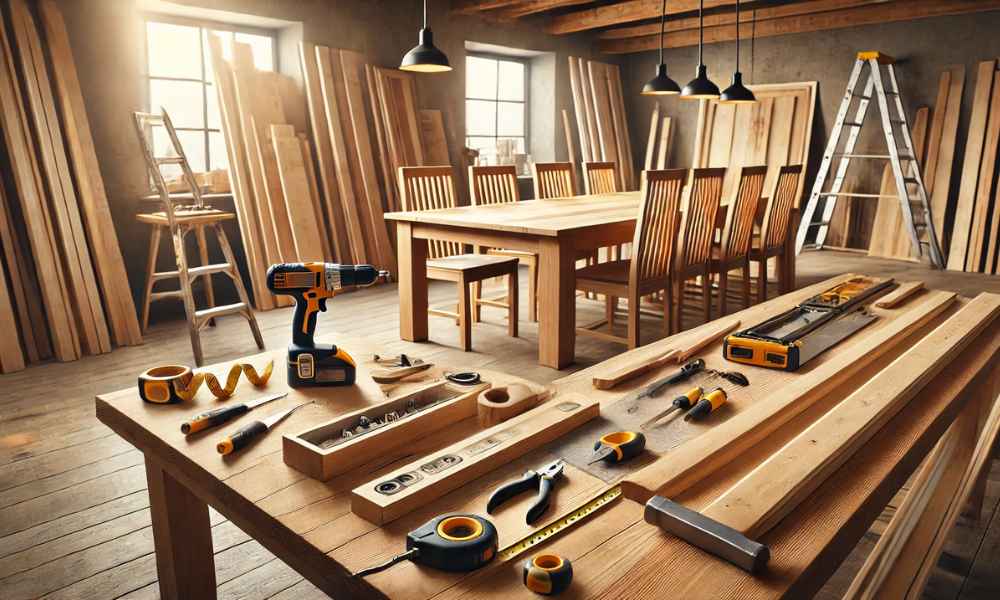
Essential Tools You’ll Need

- Measuring tape: Precision is key when determining dimensions.
- Circular saw or table saw: For accurate cuts.
- Drill and drill bits: For assembling components securely.
- Clamps: To hold pieces steady during gluing and screwing.
- Orbital sander: For a smooth, splinter-free finish.
- Carpenter’s square: To maintain perfect right angles.
Choosing the Right Wood for Your Table
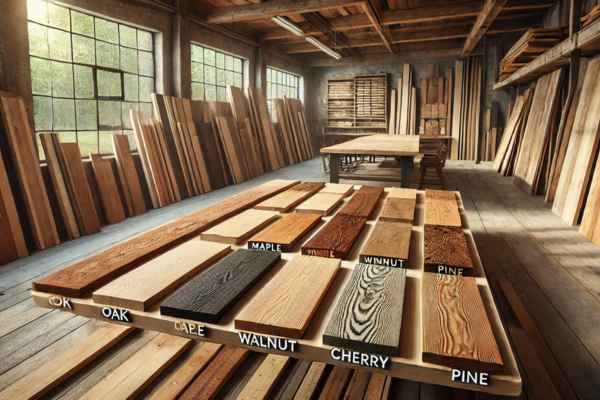
Wood selection directly influences the table’s durability and appearance. Hardwood species like oak, maple, walnut, and cherry are popular for their strength and rich grain patterns. Softwoods like pine are more budget-friendly but less resistant to dents and scratches. Consider reclaimed wood if you prefer a rustic, eco-friendly aesthetic.
Additional Materials to Consider for Durability
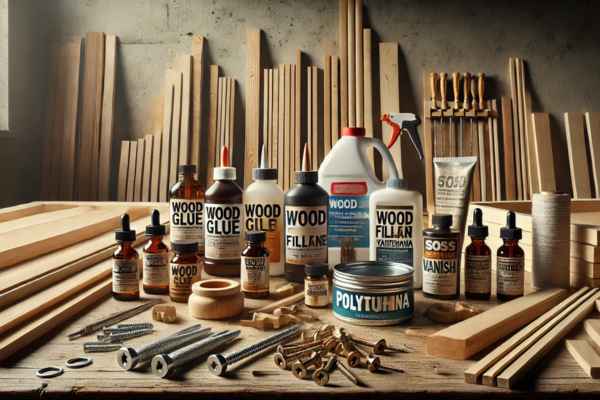
- Wood glue: Provides strong, long-lasting joints when combined with screws.
- Wood filler: For smoothing over imperfections.
- Polyurethane or varnish: To protect the surface from moisture and wear.
- Screws and fasteners: Stainless steel or brass for longevity.
Planning Your Dining Room Table
A solid plan eliminates guesswork and reduces mistakes, saving both time and resources.
Creating a Simple Blueprint
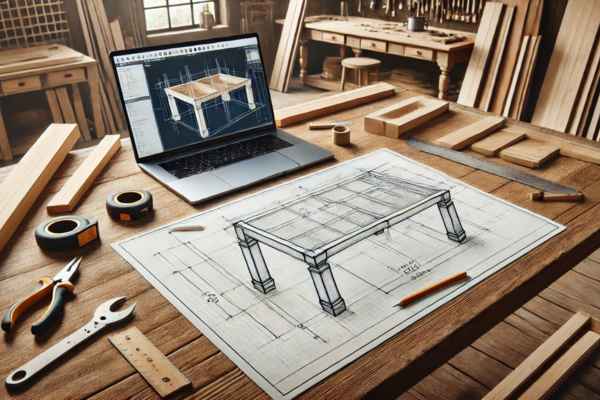
Sketch a rough design, noting key details such as dimensions, leg style, and joinery techniques. Freehand drawings are fine, but using graph paper can help maintain scale and proportion. Software like SketchUp can provide a more precise 3D visualization if desired.
Understanding Table Dimensions: Height, Width, and Length
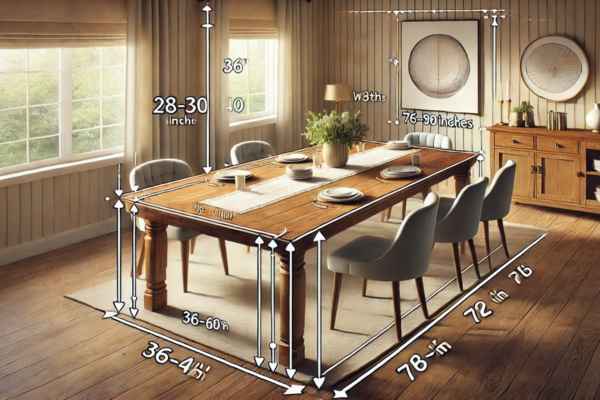
Standard dining tables are typically 28–30 inches high. The width ranges from 36 to 40 inches, providing ample space for place settings and centerpieces. The length depends on how many people you want to seat—72 inches accommodates six comfortably, while 96 inches suits eight or more.
How to Determine the Best Table Shape
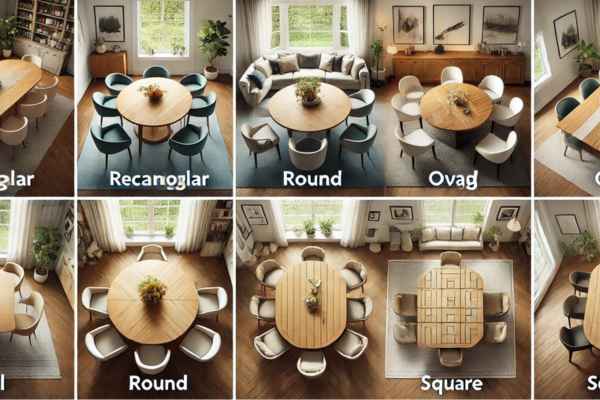
- Rectangular: The most versatile, fitting well in most rooms.
- Round: Ideal for small spaces, fostering intimate conversations.
- Oval: A softer alternative to rectangular, perfect for elongated rooms.
- Square: Great for square-shaped dining areas and smaller gatherings.
Prepping the Wood
Preparation is pivotal to achieving a professional finish. Begin by inspecting each piece for warping or defects. Use a planer to achieve uniform thickness, then sand the surfaces starting with coarse-grit sandpaper, progressing to finer grits for a silky-smooth feel. Don’t forget to wipe away dust with a tack cloth before moving on to assembly.
Building the Tabletop
Lay out the boards for the tabletop, arranging them to highlight the most attractive grain patterns. Apply wood glue along the edges, then clamp the boards tightly together. Reinforce the seams with biscuits or dowels if desired for extra stability. Once the glue dries, sand the surface thoroughly to achieve an even, seamless appearance.
Constructing the Table Legs
Table legs can be crafted from solid wood or metal, depending on your design preference. For traditional wooden legs:
- Cut each leg to the desired height, accounting for tabletop thickness.
- Taper the legs if a lighter aesthetic is preferred.
- Drill pilot holes for the attachment hardware, ensuring perfect alignment.
Assembling the Table
Now comes the gratifying part—bringing all the components together.
- Attach the apron (the wooden frame beneath the tabletop): Secure it to the underside of the tabletop using wood glue and screws. This adds structural support and helps prevent warping.
- Secure the legs: Use metal brackets, mortise-and-tenon joints, or threaded inserts with bolts for a rock-solid connection. Check for levelness throughout to prevent wobbling.
- Final tightening: Once everything is aligned, tighten all fasteners securely, but avoid over-tightening, which could split the wood.
Finishing Touches
The finish protects your table while enhancing its natural beauty. Apply a wood stain if you desire a specific color, followed by several coats of polyurethane or varnish. Lightly sand between coats with fine-grit sandpaper to achieve a glass-like finish. Consider adding decorative elements like carved details, painted accents, or custom hardware to reflect your personal style.
Troubleshooting Common Issues
- Wobbly legs: Ensure joints are tight and legs are evenly cut. Add adjustable leg levelers if necessary.
- Surface imperfections: Use wood filler for small cracks and re-sand before applying the finish.
- Gaps between tabletop boards: Check for proper clamping during gluing. Minor gaps can be filled with color-matched filler.
Caring for Your DIY Dining Room Table
Regular maintenance will keep your table looking its best. Clean with a soft cloth and mild soap solution, avoiding harsh chemicals that can damage the finish. Apply furniture polish or wax periodically to maintain luster. Use coasters and placemats to protect against heat and moisture damage.
Creative Customization Ideas
Personalize your table with unique touches:
- Epoxy resin inlays: Add vibrant color or embedded objects for a dramatic effect.
- Live edge design: Showcase the natural contours of the wood for an organic feel.
- Mixed materials: Combine wood with metal, glass, or stone for a contemporary aesthetic.
Sustainable Building Practices
Consider eco-friendly practices throughout your project:
- Reclaimed wood: Reduces waste and adds character.
- Non-toxic finishes: Safer for indoor air quality.
- Efficient material usage: Minimize offcuts and repurpose scrap wood for other projects.
Conclusion
Building a dining room table is a rewarding endeavor that combines craftsmanship with creativity. With careful planning, quality materials, and attention to detail, you’ll create a functional work of art that serves as the heart of your home. Every scratch, knot, and grain will tell a story, making your table not just a piece of furniture, but a cherished heirloom.