
Installing kitchen cabinet doors can be a daunting task for those without the necessary know-how. With the right tools and a few simple steps, however, you’ll be able to complete this project like a professional. In this article, we will explain how to install kitchen cabinet doors in easy-to-follow instructions. From gathering all required materials to installing the door. You will learn exactly what needs to have done to ensure that your doors properly secured in place.
Why Do You Install Kitchen Cabinet Doors?

Kitchen cabinet doors are essential for both aesthetic and practical reasons. For starters, they provide a finished look to the kitchen and can customize to match the homeowner’s style. This can help create a cohesive look throughout the space that ties together the walls, flooring, and appliances.
In addition to making the kitchen look better, closet gates also serve a practical purpose. They protect items stored inside from dust and dirt, as well as from curious hands or paws. This helps keep items in your cabinets clean and organized, which is important for any busy kitchen.
Installing closet gates adds to the overall strength of the cabinets themselves. Doors help keep cupboards closed and stable when opened or closed frequently, helping them last longer over time.
Advantages Of Install Kitchen Cabinet Doors

Installing kitchen closet doors is an easy and cost-effective way to update the look of your kitchen. Not only can it make a huge impact in terms of aesthetics, but many other advantages come with this project.
One major advantage of installing new kitchen cabinet gates is that you can customize your cabinets to fit your exact style and design needs. Whether you’re looking for a classic or modern look, there’s a variety of options when it comes to closet door designs, materials, colors, and hardware that you can choose from. This ensures that you get the perfect look for your home without having to replace all of your existing cabinetry.
Installing new kitchen closet doors is very straightforward and does not require any specialized skills or tools.
Here Are Some Steps On How To Install Kitchen Cabinet Doors
Step 1. Gather The Necessary Tools And Materials

Install kitchen cabinet doors daunting task, but with the right tools and materials, it doesn’t have to be. Before you begin your project, make sure you have gathered all of the equipment and supplies that you need.
To install kitchen cabinet doors, start by gathering a screwdriver (preferably Phillips), drill bit set, electric drill, wood screws, shims (for spacing), self-closing hinges, door pulls or knobs, and a level to ensure everything is even and aligned. Additionally, it’s important to purchase wood filler if there are any holes or gaps in the cabinets that need filling before installation. Once you’ve collected all of these items for your project, you’ll be ready to begin installing new closet gates in your kitchen!
Step 2. Remove Old Cabinet Doors (If Necessary)
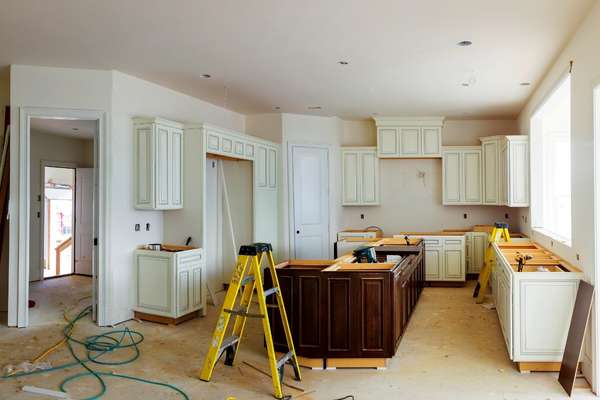
Removing old cabinet doors is an important step for any kitchen remodeling project. It is necessary to remove the existing cabinet gates if you plan on installing new kitchen cabinet gates. Doing so will allow for a seamless transition from your old kitchen style to your new look.
The process of removing old cabinets begins with turning off the power, water, and gas supply lines connected to them. Once this in done, it’s time to take off all hardware associated with the door such as handles, hinges, and latches. After these items have to removed, unscrew the screws located around each side of the frames to loosen them from their wall mountings. To finish up, carefully lift out each door and set it aside for disposing or reusing later on.
Open Old Cabinet Doors
Opening old kitchen cabinet doors can be a daunting task. Many older cabinets have to paint multiple times, making it difficult to open the cabinet door without damaging it or the surrounding area. The first step in removing an old kitchen closet door is to determine whether or not it has any hinges. If so, you will need to unscrew them from the frame. If there are no hinges, then you’ll need to use a flathead screwdriver or crowbar to pry off the door from its frame.
Once all of the screws and/or nails have to removed, you should be able to lift off the closet door with minimal effort. Once removed, inspect for any damage that may have occurred during removal and take note of how the door fits into its frame for future reference when replacing it later on.
Unscrew Hinges From The Cabinet Frame

The first step is to open the gates and locate where the screws attached to the hinges on the sides of the door. Use a screwdriver to loosen each hinge screw until it comes out of its hole in the frame. To make sure you don’t lose any screws, place them all together on one side or in a small container as you take them out. Once all of the screws are removed, gently pull apart each hinge from their mounting positions on either side of the frame. If there is a difficulty due to years of paint buildup, use a utility knife or putty knife to break through any excess buildup before pulling it apart.
Remove Old Cabinet Doors

Removing old kitchen cabinet doors can be a time-consuming, yet rewarding task. By taking the time and effort to remove your outdated kitchen closet gates, you are investing in modernizing the look of your kitchen. Not only is this a cost-effective way to update the overall look, but it also provides an opportunity for creative expression.
The process of removing the existing cabinet is fairly straightforward, But certain steps must be taken to ensure that no damage occurs during the removal. Start by loosening the screws or bolts at each corner where the door connects with its frame; then gently slide out each hinge pin. With all components removed from the frame, set them aside and safely store them away until ready for installation of your new gates.
Step 3. Prepare Cabinet Doors For Installation
Preparing your kitchen cabinet doors for install an important step in the process of remodeling or renovating a kitchen. Without proper preparation, you may find that the installation process is more difficult and time-consuming than it needs to be. Ensure that these doors are installed correctly and with ease.
When preparing kitchen closet gates for installation is to inspect them for any damage or imperfections. If any damages are found, they should to addressed right away to proceed further. Also, check that all hardware such as hinges and screws are included with each door and make sure they fit properly into their designated holes.
Sand any rough edges on it using medium-grit sandpaper until they become smooth and even. This will enable easier movement when installing them onto the frames.
Determine Hinge Placement
When you’re preparing to install kitchen cabinet doors, proper hinge placement is essential for both function and aesthetics. To ensure that the gates hang correctly, take time to accurately determine the ideal hinge placement. This will help create a clean look and prevent any issues with closing or opening the cabinet doors.
Begin by measuring each door, making sure to note any irregularities or special considerations such as a slight offset between two sides of a door. Next, place one hinge on the edge of the closet frame and one on the door, making sure that they are horizontally aligned. Depending on your preference, you may want to use a drill bit slightly smaller than your screws so as not to damage your cabinets when installing them in place. Finally, secure each side of the hinges with screws before testing out their functionality.
Mark Hinge Placement With A Pencil

Install kitchen cabinet doors daunting task, But with the right preparation, It can become A much simpler process. One important step is to properly mark the hinge placement locations with a pencil. Having accurate measurements and placements for these hinges will ensure that your closet gates fit securely in place when you install them.
The most accurate way of marking hinge placement locations is to use a pencil rather than measuring tape or any other tool. Start by measuring the length and width of your door and marking the center point on both sides with a pencil. From there, measure out from each side to where you want your hinges placed, and make sure that they are level before marking them down with a pencil as well. This will give you exact measurements for where each of your hinges should be placed when installing your cabinet doors.
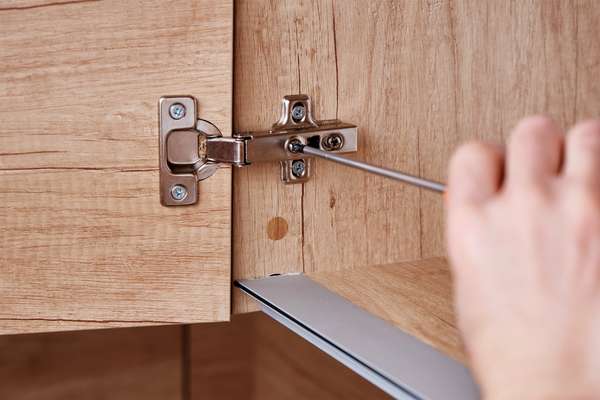
Pre-Drill Screw Holes For Hinges

Install kitchen cabinet doors requires a proper preparation. Pre-drilling screw holes for the installation of hinges is an essential step in the process. Hinges are necessary to secure the door to the frame and ensure that it swings open and closed with ease.
The pre-drilling process will depend on whether you’re using Euro-style or traditional-style closet gates. For Euro-style cabinets, use a template guide to mark out two evenly spaced pilot holes where you will insert the screws for each hinge. Traditional style cabinets require drilling two pilot holes per hinge at slightly different depths – one hole should be slightly deeper than the other so that there’s enough space for both screws to fit securely into place.
No matter what type of cabinet door you decide to install, pre-drilling screw holes is an important step in preparing your kitchen cabinet gates for installation.
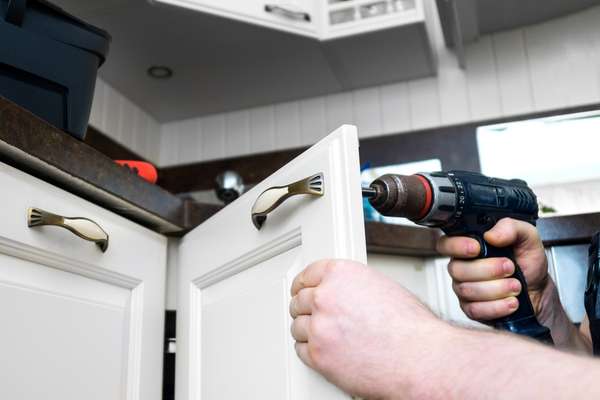
Screw Hinges Onto Cabinet Doors

Preparation is key for any home improvement project, and kitchen closet doors are no exception. When installing new cabinets, ensuring that the hinges are properly attached to the door is essential for a successful outcome. Taking the time to screw hinges onto closet gates before installation will save time and money down the road.
To begin preparing your kitchen cabinet gates for installation, start by gathering all of the necessary materials: door hinges, screws or nails to fasten them in place, and a drill or screwdriver with appropriate drill bits and bit sizes. All of these pieces should be available at your local hardware store. Once you have your supplies gathered, line up each hinge against its respective door according to the manufacturer’s instructions. Mark where each screw or nail needs to go into the frame of each door before drilling holes and attaching hinges firmly.
Step 4. Install Cabinet Doors Onto The Cabinet Frame

Updating the look of your kitchen can be achieved in a variety of ways, one of which is installing kitchen closet doors. This simple project requires minimal time and effort to complete and will leave you with beautiful new cabinets that will brighten up your space.
The installation process begins by measuring the existing frame of the cabinet, then ordering the doors to fit accordingly. It’s important to select a durable material that is designed for high-heat environments so it can withstand heavy usage and last for many years. Once the gates are delivered, they should be placed against the wall and aligned with the cabinet frame. The hinges must also be correctly aligned for a secure fit when attaching them to both the door and frame with screws or nails. Finally, all screws should be tightened securely to ensure long-lasting stability so you can enjoy your newly installed kitchen closet gates for years to come!
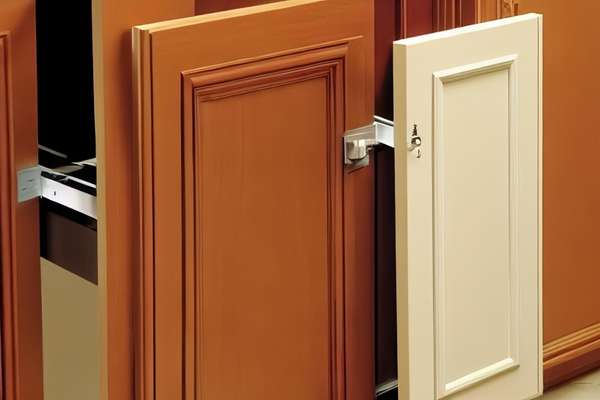
Hold The Cabinet Door In Place On The Cabinet Frame
Installing kitchen cabinet doors onto the cabinet frame can be overwhelming, especially if it is your first time. However, with the right tools and instructions you can easily hold the closet door in place on the closet frame.
You will need to take precise measurements of the opening to ensure that your door fits correctly. Next, use wood screws or metal clips to attach a mounting strip along each side of the opening. The strips should be placed flush against each edge of the opening. This will provide support and stability for both sides of the door when it is attached to the frame. Finally, use hinges or glides to secure your door onto its corresponding mounting strip. Once this is done, hardware such as knobs and handles may be added for a more polished look.
Screw Hinges Onto Cabinet Frame
Installing kitchen cabinet gates onto the closet frame is a simple process that can be completed easily with the right tools. The most important tool you will need is a screwdriver, which should be the correct size for the screws that are used in your particular project. Additionally, you may want to use a drill bit and pilot hole if you plan on using longer screws.
The first step to installing new kitchen cabinet gates onto the frame is to attach two hinges per door. When attaching hinges, it’s important to make sure they line up evenly so that when closed, your kitchen cabinets look neat. To attach each hinge, simply insert one of the screws into its pre-drilled holes then insert it into the corresponding holes of your cabinet frame. Use a screwdriver or drill bit with an appropriate attachment to secure them tightly in place.
Adjust Cabinet Door Position As Necessary
Adjusting the position of closet doors is a common maintenance task for homeowners. It is important to ensure that the doors are properly aligned and securely attached to the cabinet frame. Doing this ensures that the gates open and close smoothly, with minimal effort from the user.
When adjusting kitchen cabinets, it can be easy to overlook cabinet door positioning. If a homeowner notices that their closet doors are misaligned or crooked, they may want to take action right away to avoid further damage or costly repairs in the future. It is simple enough for most people to adjust their own closet door positions by loosening screws on each hinge until it reaches its desired alignment onto the frame. Once adjusted, these screws should then be tightened back up so that everything remains secure and stable during use.
Tighten Screws To Secure The Cabinet Door

Tightening screws is an important step in any kitchen renovation project, as it ensures that your doors are securely attached and won’t move out of place. Doing the job correctly will save you time and money down the road, and prevent potential damage or accidents from happening due to loose gates.
Before beginning, make sure all of your hardware is present and accounted for. This includes screws, washers, nuts, and any other necessary parts required to secure your door hinges. Once all pieces are gathered together, line up your door with the frame so that it fits snugly but isn’t too tight. Next, use a drill or screwdriver to attach each hinge onto the frame one by one.
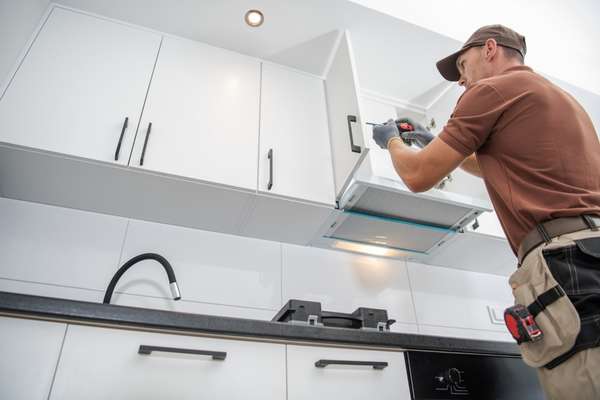
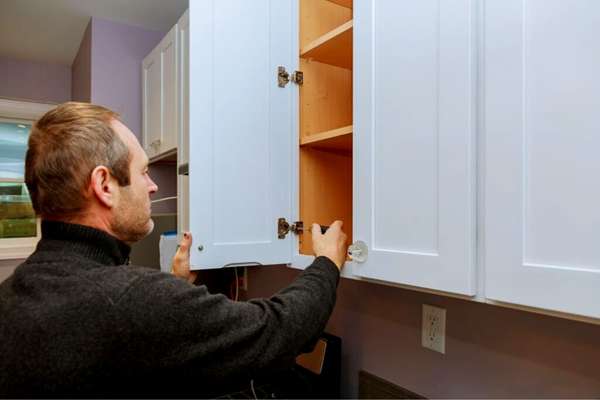
Step 5. Test Cabinet Doors

The first step in installing kitchen cabinet doors to check the hinges and make sure they securely attached to the closet frame. After checking that the hinges are secure, you should then open and close each door to test for proper alignment. It’s important to ensure that every hinge works correctly before proceeding with installation as it will make the process much easier and faster. Once all of the hinges have tested, you can then mount each door into its respective opening in your closet frame. Make sure all screws are tight and secure before moving on with your project.
Open And Close Cabinet Doors

The kitchen is one of the most important areas in a home, and it is important to make sure that all elements of the kitchen are functioning properly. Testing kitchen closet gates are an easy way to ensure that your cabinets are safe and secure.
Cabinet doors should have tested regularly by opening and closing them multiple times. It’s important to check for any issues with alignment or stability while doing this. If you notice any looseness, creaking, or warping in the movement of the door, these could indicate problems with hinges or other hardware components. Additionally, inspect the seal between the door and frame for signs of deterioration such as cracks or gaps which could lead to water damage over time.
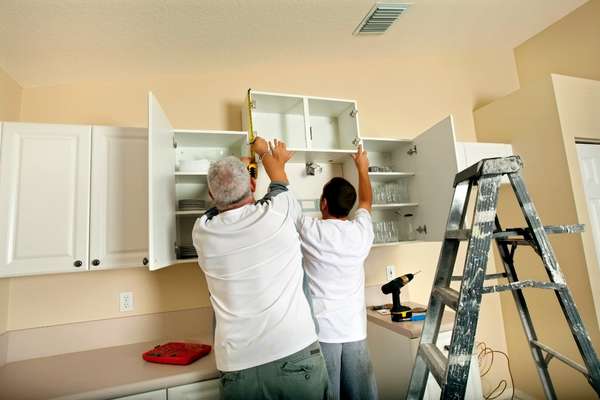
Ensure That Cabinet Doors Are Level And Secure
Ensuring your kitchen cabinet gates are level and secure is an essential part of any renovation or remodeling project. When planning a new design, test kitchen closet doors to make sure they aligned properly. This is key for a successful installation that looks great and lasts for years.
The first step in testing your cabinet gates is to measure up from the floor on both sides of the opening. Make sure each side has the same measurement, so you can be sure that the door will align properly when hung. Also, check if there any pre-drilled holes in the frame around it; if not, then you’ll need to drill them yourself and install the hinges and door handles. Once done, open and close all of the doors several times to check.
Make Any Necessary Adjustments To Ensure Proper Alignment And Operation
When it comes to ensuring that your kitchen closet gates properly aligned and operating. They should, make any necessary adjustments is a must. Test each door by opening and closing them several times to ensure that they open and close as intended. If you notice any issues with the alignment while doing this, consider making the following adjustments:
Start by loosening the screws at the hinges until there’s some play in them. Then you can carefully move the door into place until it functions correctly. Make sure to tighten the screws once more after everything in aligned properly. Additionally, check around the frame of each door for any gaps or warping. If needed, use wood putty or caulk to fill these areas for a snug fit. Once done, test out your newly adjusted doors again to make sure. Everything is functioning correctly before moving on with other projects in your kitchen renovation!
Step 6. Repeat Steps For Remaining Cabinet Doors (If Necessary)
Installing kitchen cabinet doors is an important part of the overall kitchen renovation process. When replacing old closet gates with new ones, it’s important to ensure a proper fit and secure installation. For homeowners looking to complete this task on their own, they must understand how to properly install each door.
First and foremost, the existing hinges should examine for wear and tear. If any damaged or worn out, they should have installed the new cabinet gates. Additionally, before attaching the new door. A drill can have used to pre-drill holes for easy installation of screws and other hardware.
Once ready for installation, the new kitchen closet door can be. Then have the attached using screws and adjusted until level with its counterpart.
Step 7. Finish Up
At the end of any home improvement project. It’s important to take the time to finish up and make sure everything is in place. Installing kitchen cabinet gates can daunting task but with the right tools and knowledge. You can get the job quickly and easily.
Gather your supplies first: closet doors, screws, drill or screwdriver, measuring tape, and level. Take a few minutes to read through any instructions. That comes with your new gates before you start so you know how they should have installed. Measure twice – then measure again to ensure the accurate placement of each door on its corresponding frame. Use a level to check that each door is even with its neighbor before securing it with screws. A good tug to make sure it’s snug in place and ready for use!
Clean Up The Work Area

An organized work area is essential for a successful home improvement project. Whether you’re installing kitchen cabinet doors or replacing old insulation. Having the right tools and materials on hand will make the job much easier.
Organizing your workspace before beginning any project can save you time and frustration in the long run. Start by clearing away the clutter; sort through items and discard anything. That won’t have used during the installation of kitchen closet doors. Make sure to have all necessary tools available within easy reach. Such as a screwdriver, drill bits, leveler, and measuring tape. Gather all supplies needed for the project so they’re ready to use when you are. New kitchen closet doors without having to search for misplaced components or equipment.
Dispose Of Old Cabinet Doors
If you’re looking to upgrade your kitchen cabinets, there’s no better way than to install brand-new cabinet doors. Not only do fresh cabinet gates provide a more modern and stylish look. But they also allow you to customize the interior design of your kitchen. Before installing new door panels on your existing framework. It is important to properly dispose of any old cabinet gates that have removed from the frame.
There are numerous ways to properly get rid of used closet doors. One option is to donate them to local charities or thrift stores. Another possibility is to upcycle the material into something else. Entirely like artwork or furniture pieces for other rooms in your home. Alternatively, you may choose to scrap. The wood for extra cash or recycle them through a local recycling program if available in your area.
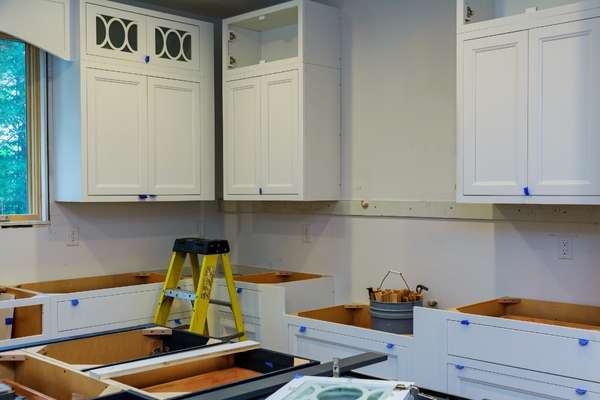
Step 8. Enjoy Newly Installed Cabinet Doors!

Homeowners know the value of a kitchen in their life. It is the most important room in any home, and it needs to be perfect. Installing new kitchen cabinet gates can completely transform the look and feel of a kitchen. Transforming it into an inviting space while creating additional storage space.
For those looking to give their kitchen an upgrade, installing new cabinets is a great solution. Not only do they provide extra storage space for food items. But they also come in an array of colors and styles. That can turn any dated kitchen into something modern and stylish. With cabinet gates being relatively easy to install, homeowners can enjoy them. The transformation process without having to worry about hiring professionals or breaking the bank for costly renovations.
The Final Thoughts
In conclusion, replacing or installing. Install kitchen cabinet doors are a great way to freshen up the look of your kitchen. It is an easy and cost-effective project that can have completed in just a few hours. With the right tools, supplies, and preparation, you can easily install your new cabinet doors in no time. Don’t have intimidated by this process – with these step-by-step instructions. Anyone can create a beautiful space that will last for years to come.