
Upholstering the back of A wooden dining chair can be A great way to give an old piece of furniture A new look. Whether you’re looking to spruce up your home décor or simply reupholster A vintage piece, The process is surprisingly straightforward. In this article, We’ll walk you through the steps for how to upholster the back of A wooden dining chair, Providing tips and advice along the way.
What Is A Wooden Dining Chair?
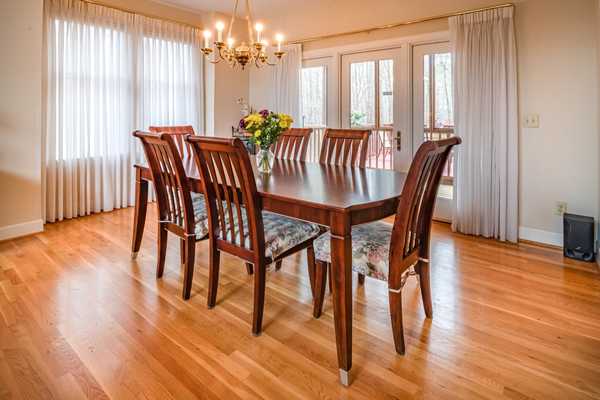
A wooden dining seat is A type of furniture designed for seating people during meals or gatherings. It is typically constructed of wood, with A seat, backrest, And legs that support the weight of the user. Wooden chairs are available in a wide range of styles, From simple And traditional to ornate And contemporary. They can make from A variety of wood types, including oak, maple, cherry, and mahogany, each of which offers unique characteristics in terms of durability, strength, And appearance. Wooden dining chairs are versatile And can use in A variety of settings. From formal dining rooms to casual kitchens And outdoor patios. They are A popular choice due to their durability, and aesthetic appeal. And the ability to complement A variety of interior design styles.
What’s Important About The Back Of A Wooden Dining Chair?
The back of A wooden dining seat is very important. As it provides support And comfort to the person sitting in it. It also contributes to the overall aesthetic of the seat, Making it an integral part of its design.
When considering the back of A wooden seat, It is important to consider both form And function. The back should be designed with ergonomics in mind, Providing adequate support for the user’s spine And shoulders. It should also be aesthetically pleasing, Adding to the overall look and feel of the seat. Depending on the style And design of your dining room. You may want to choose A seat with an ornate or decorative back for added visual appeal.
Selecting A wooden dining seat, It is important to consider how well-made it is. A poorly constructed back can not only look unattractive but can also affect its durability over time.
Why Upholster The Back Of A Wooden Dining Chair?

Upholstering the back of A wooden seat adds both comfort And style to the furniture. The padding provides extra cushioning for those seated in the seat. Making it more comfortable to sit for extended periods of time. Additionally, Upholstered chairs create an elegant look that can elevate any dining room. Upholstery also helps protect the wood from dirt, dust, and other particles that can damage or stain it over time. In addition to providing comfort And style, Upholstered chairs are also often easier to clean dining chairs than their non-upholstered counterparts.
Benefits Of Upholster The Back Of A Wooden Dining Chair
Upholstering the back of a wooden chair can provide A number of benefits. It adds comfort to the seat. The upholstery can be tailored to suit your specific needs And preferences. Allowing you to choose A fabric that is soft And comfortable for sitting in.
Secondly, upholstering the back of A wooden seat can add style And sophistication to the piece. You can choose from A wide range of fabrics And colors to create A look that suits your home’s décor. This will give your dining room an elegant And inviting atmosphere.
Upholstering the back of A dining seat provides additional protection against wear And tear. The fabric will help protect the wood from scratches, dents, And other damage caused by regular use. This can help extend the life of your furniture And keep it looking great for years to come.
Here Are Some Exclusive Guides To Upholster The Back Of A Wooden Dining Chair
Method: 01 Make Sure You Have The Right Tools

Creating A beautiful dining experience requires the right furniture And accessories. Upholstering the back of A wooden seat is an important part of creating that special ambiance in your home. It is important to have all the necessary tools to complete this project quickly and efficiently.
The basic tools for upholstering are A staple gun, stapler remover, fabric scissors, measuring tape, utility knife, And foam padding. A staple gun is used to attach the fabric securely to the wood frame while A stapler remover removes staples without damaging either the fabric or the wood surface. Fabric scissors help cut material evenly while measuring tape helps ensure precise measurements before cutting out any pieces of fabric. A utility knife helps trim excess material from edges and corners as well as cutting through foam padding for cushioning behind the fabric coverings on chairs or sofas.
Method: 02 Gather The Necessary Material
To begin this project, Gather all of the necessary materials. You will need fabric or vinyl for upholstery, batting or foam for padding, basic tools such as A staple gun or drill, tacks or nails if desired, And wood glue for securing pieces if needed. And other supplies such as scissors to cut fabric as needed. Once you have everything together And ready to go in one spot. You can easily move through each step of the process with ease.
Method: 03 Inspect The Chair For Loose Materials
When inspecting the seat, Start by looking at all of the visible screws And joints to ensure they are securely fastened. If any are loose, Use A screwdriver or hammer to tighten them before continuing. It is also important to check underneath the seat of the seat and along its edges for any staples or nails that may have come undone over time. If necessary, Use pliers or tweezers to remove them from the wood before proceeding with your project.
Method: 04 Use A Screwdriver & Pliers

Use the screwdriver to remove any screws that may fasten the upholstery to the back of the chair. Carefully pry off any staples or nails with your pliers that may also hold the fabric in place. Once all pieces are removed, Prepare your new material for upholstery And secure it tightly around the back frame with A staple gun or thick-gauge nails. Reattach any screws that were taken out earlier to ensure everything is properly secured.
Method: 05 Vacuum Away The Remaining Bits
The process begins by removing any existing fabric or staples on the back of the chair. After this is complete, A vacuum is to sweep away any remaining bits that may leave behind. This step is important because if there are any leftovers they could affect how well the new fabric adheres to the wood. Once all remnants have been eliminated. It’s time to measure out And cut your chosen upholstery material before attaching it with either nails or screws.
Method: 06 Choose The Right Fabric

The fabric must be strong and durable in order to handle regular use And wear-and-tear. While also adding an attractive aesthetic to your home. To help you make an informed decision on which fabric to choose for your upholstery project. We’ve compiled A list of some key points you should consider.
Think about how often the chairs will use. If they are likely to experience daily or frequent use. Then look for fabrics that are hard-wearing And resistant to tearing or staining. Consider A woven cotton blend or faux leather if you want something that looks luxurious yet practical. If the chairs won’t get much use, Then opts for fabrics with soft textures such as velvet or linen for added comfort when seated.
Method: 07 Cut The Fabric To Size
The first step in the process is cutting the fabric to size. When it comes to cutting the fabric, Make sure you use sharp scissors or better yet. A rotary cutter for clean lines And accurate measurement. Measure out the size of the fabric needed for the back of your chair And mark it with chalk before you start cutting ensuring that it’s large enough for any tucks or folds you may have in mind. Be sure to leave 1/2 inch extra on all sides so that when attaching your upholstery.
Method: 08 Prepare The Chair Back
To begin with, you need to check that all parts of the seat are in good condition. Secure any loose screws or nails using a drill and replace any badly damaged pieces before moving on with your project. Next, use sandpaper or A sander to smooth down any bumps and ridges in the wood so that your fabric will adhere neatly and evenly.
Make sure that you choose an appropriate adhesive for your fabric type before applying it to the chair back. When done correctly, upholstering the back of a wooden dining seat can be an easy DIY project with great results!
Method: 09 Attach Fabric To Chair Back

To attach the fabric to the back of a wooden dining seat, start by measuring and cutting the fabric for each chair’s back panel. Once cut, lay the fabric face down on a flat surface and place the batting on top. Place each panel over the batting and staple both together along three sides using a heavy-duty staple gun. Then, secure any loose edges with tacks or more staples before attaching the newly upholstered panels onto their respective chairs with screws. Finish off by tying cords around each tufted area if desired, adding buttons or other decorations as desired.
Method: 10 Trim Any Excess Fabric You Might Have Leftover
One of the most important steps is trimming any excess fabric that you might have left over after upholstering your seat. Using scissors or another sharp tool, trim away any extra fabric on the edges of the backrest and along its sides. The goal here is to make sure that no material will be visible from the front or sides when finished. You’ll also want to secure all loose ends with either fabric glue or staples so there aren’t any fraying pieces left behind when you’re done.
Method: 11 Add Upholstery Nails (optional)
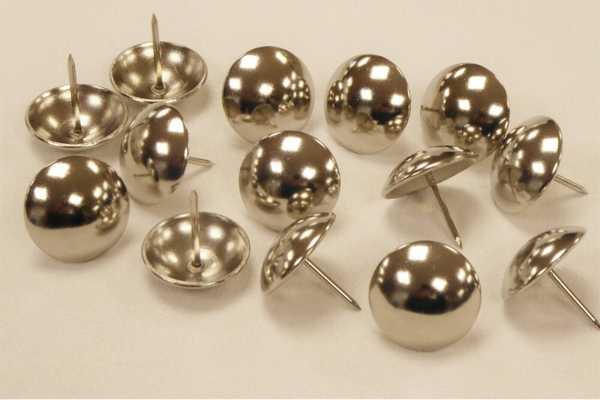
Adding upholstery nails can make the project easier and provide a more professional-looking result. Upholstery nails come in many sizes, shapes, and finishes, making it easy to find one that will complement your furniture.
When shopping for upholstery nails, look for ones with flat heads so they won’t tear through fabric or interfere with seating comfort. Small tacks are also available; these are especially useful when attaching fabric or leather to wood as they blend into the surface better than larger head designs. Once you have chosen the right type of nail for your project, install them evenly around the edge of the seat back using either a hammer or an electric brad gun.
Method: 12 Add Foam And Batting
Foam and batting are two essential components that include upholster a wooden dining chair. Foam provides necessary cushioning so you can comfortably lean against the back of the chair while eating or conversing. The type of foam you choose will depend on personal preference, as some may prefer something firmer while others look for softer material. Make sure to measure your seat before purchasing foam in order to get an exact fit.
Method: 13 Add Any Padding
Adding padding to the back of a wooden dining chair is an easy and inexpensive way to update your furniture. Not only does it add comfort for those seated around the table, but upholstering can also give a room an entirely new look. Whether you’re looking for an upgrade or just want to make your dining area more comfortable, here’s what you need to know about adding padding to the back of a wooden seat.
Start by measuring the back of the chair so you can purchase enough fabric to cover it. If desired, you may choose multiple fabrics and even mix prints and colors for added visual interest. Once you have decided on your material and bought batting or foam (or both), take apart the chair’s seat cushion as well as its back panels to expose its frame.
Method: 14 Staple Fabric To Foam
Foam and fabric are two common materials used in upholstering the back of a wooden dining chair. By following these simple steps, you can easily staple the fabric to foam and complete your home improvement project with confidence.
To begin, cut the foam to fit the size of the back of the chair. Make sure that it is slightly larger than the frame so that it will cover all areas. Next, place a piece of batting underneath the foam and use glue to adhere it if needed. Once secured, cover both pieces with an upholstery fabric or other material of choice and pull tight over both layers before stapling into place. When stapling, start at one corner and work around until all edges are securely fastened onto the wood. Finally, trim off any excess fabric from around the edges for a neat finish.
Method: 15 Cover Staples With Trim (optional)
If you’re looking for an easy way to give your furniture an updated look, covering staples with trim is a perfect solution. Not only does this technique offer a visually appealing outcome, but it’s also simple and relatively inexpensive.
Choose upholstery fabric that matches the color palette of your room and cut it into strips that are two inches longer than the height of your chair back. Start by attaching the fabric to each side of the back using small staples. Making sure to pull it tight before securing each one. Once you’ve covered all four sides with fabric. Use scissors or pinking shears to cut off any excess material around the edges of the frame.
Method: 16 Use Screwdrivers To Secure The Chair Back
Here’s what you need to do: First, check that all screws are tight on your furniture piece. If any look loose or damaged, replace them with new ones. Once secure, take off any existing fabric from the back cushions or pillows and remove any staples from them. Then lay out new fabric for the entire cushion area so that it is large enough to cover both sides and wrap over itself at least 1 inch on each side when stapled down.
Method: 17 Add Finishing Touches
Adding the finishing touches to one’s dining room décor can be a daunting task. Upholster the back of a wooden dining chair is a simple project that can have a dramatic effect on the look and feel of the room. With some basic tools and a few materials, anyone with moderate DIY experience can complete this job in the afternoon.
The first step to upholstering the back of a wooden seat is to remove any existing padding or fabric from the frame. Then, use sandpaper to smooth out any rough surfaces on both sides of the chair frame before wiping it down with some rubbing alcohol and allowing it to dry completely. Next, measure out enough batting and fabric for each side of the frame according to measurements taken earlier and staple it securely in place at all edges. Finally, add decorative nails around all edges for added interest, if desired!
The Final Thoughts
In conclusion, the upholster wooden dining chair is a relatively simple task that can make all the difference in transforming a room. In order to successfully upholster the back of a chair. You should select your fabric and foam wisely, ensure you have the necessary tools, and understand the basics of the upholstery before beginning. With careful planning and execution, you can create beautiful seating solutions for your home with ease.